आपने शायद देखा है कि आपके इलेक्ट्रॉनिक्स किसी भी एक समय में आप का उपयोग करने के लिए उत्तरोत्तर गर्म हो जाएंगे। कुछ उपकरणों में ओवरहिटिंग से बचाने के लिए शीतलन तंत्र या पंखे होते हैं। लेकिन फ्लैश ड्राइव गर्म क्यों होते हैं?
फ्लैश ड्राइव लगातार और भारी उपयोग के माध्यम से गर्म हो जाते हैं, इसके धातु के घटकों को गर्म करने के कारण, और ड्राइव या होस्ट डिवाइस की विफलता के कारण।
USB ड्राइव के उपयोग के साथ थोड़ा गर्म होना असामान्य नहीं है, चाहे वह कुछ मिनटों या घंटों का हो। वास्तव में, यह वैज्ञानिक रूप से अपेक्षित है। USB ड्राइव का उपयोग अपने और होस्ट डिवाइस (यानी आपके कंप्यूटर) के बीच सूचना को संग्रहीत करने और स्थानांतरित करने के लिए किया जाता है। दोनों के बीच निरंतर स्थानांतरण गर्मी का कारण बनता है क्योंकि यह डेटा को स्थानांतरित करने के लिए ऊर्जा लेता है। दोहराए जाने वाले उपयोग के माध्यम से, अतिरिक्त ऊर्जा का उपयोग किया जाता है और गर्मी में तब्दील हो जाता है।
अधिकांश अन्य घटकों की तुलना में धातु को अवशोषित करना बेहतर होता है जो फ्लैश ड्राइव बनाते हैं। जैसा कि आप कल्पना कर सकते हैं, धातु यूएसबी ड्राइव अक्सर प्लास्टिक या लकड़ी के ड्राइव की तुलना में गर्म हो जाते हैं। धातु शरीर को संभालने के लिए कभी भी गर्म नहीं होना चाहिए।
हालाँकि, कुछ चीज़ें USB को ज़्यादा गरम कर सकती हैं और संभावित रूप से नुकसान पहुँचा सकती हैं। एक ठीक से काम करने वाली ड्राइव को ज़्यादा गरम नहीं करना चाहिए, लेकिन अगर यह जिस बंदरगाह से जुड़ा है वह दोषपूर्ण है, तो इसे बहुत अधिक शक्ति प्राप्त हो सकती है। अतिरिक्त शक्ति, जैसा कि ऊपर उल्लेख किया गया है, गर्मी में स्थानांतरित किया जाता है और संभवतः आपको या ड्राइव को जला सकता है। यह विशेष रूप से धातु कनेक्टर के साथ सच है, इसलिए ध्यान रखें।
इसके अलावा, यदि आपका ड्राइव बहुत गर्म हो रहा है, तो यह भी संभव है कि एक आंतरिक घटक विफल हो गया है और बहुत अधिक बिजली यूएसबी से गुजर रही है।
यदि आपकी ड्राइव आपको जलाने के लिए पर्याप्त गर्म है, तो कपड़े या पोथोल्डर्स के मोटे टुकड़े का उपयोग करके इसे कंप्यूटर से सावधानीपूर्वक हटा दें। इसे ठंडा होने दें और दूसरे ड्राइव के साथ पोर्ट का परीक्षण करें। यदि यह गर्म होता है, तो आपके पास एक दोषपूर्ण यूएसबी पोर्ट होने की संभावना है। यदि नहीं, तो आप सुनिश्चित कर सकते हैं कि गलती बहुत गर्म ड्राइव के साथ है।
यहां टूटी हुई फ्लैश ड्राइव डेटा रिकवरी के बारे में जानें और यहां टूटी या दूषित यूएसबी ड्राइव से डेटा कैसे पुनर्प्राप्त करें।
अपने USB ड्राइव को मध्यम तापमान पर रखना महत्वपूर्ण है क्योंकि इसके आंतरिक घटक तापमान के लिए अतिसंवेदनशील होते हैं। यदि वे अधिक आर्द्रता और तापमान (या तो बहुत गर्म या बहुत ठंडा) के संपर्क में आते हैं, तो मेमोरी और कंट्रोलर चिप्स खराब हो सकते हैं और पूरी तरह से दूषित हो सकते हैं। गर्मी के लिए लंबे समय तक जोखिम विशेष रूप से आपके ड्राइव को बहुत जल्दी मार देगा। अपनी कार या बाहर जैसे चर वातावरण में अपनी ड्राइव को छोड़ने से बचें।
aapane shaayad dekha hai ki aapake ilektroniks kisee bhee ek samay mein aap ka upayog karane ke lie uttarottar garm ho jaenge. kuchh upakaranon mein ovarahiting se bachaane ke lie sheetalan tantr ya pankhe hote hain. lekin phlaish draiv garm kyon hote hain?
phlaish draiv lagaataar aur bhaaree upayog ke maadhyam se garm ho jaate hain, isake dhaatu ke ghatakon ko garm karane ke kaaran, aur draiv ya host divais kee viphalata ke kaaran.
usb draiv ke upayog ke saath thoda garm hona asaamaany nahin hai, chaahe vah kuchh minaton ya ghanton ka ho. vaastav mein, yah vaigyaanik roop se apekshit hai. usb draiv ka upayog apane aur host divais (yaanee aapake kampyootar) ke beech soochana ko sangraheet karane aur sthaanaantarit karane ke lie kiya jaata hai. donon ke beech nirantar sthaanaantaran garmee ka kaaran banata hai kyonki yah deta ko sthaanaantarit karane ke lie oorja leta hai. doharae jaane vaale upayog ke maadhyam se, atirikt oorja ka upayog kiya jaata hai aur garmee mein tabdeel ho jaata hai.
adhikaansh any ghatakon kee tulana mein dhaatu ko avashoshit karana behatar hota hai jo phlaish draiv banaate hain. jaisa ki aap kalpana kar sakate hain, dhaatu yooesabee draiv aksar plaastik ya lakadee ke draiv kee tulana mein garm ho jaate hain. dhaatu shareer ko sambhaalane ke lie kabhee bhee garm nahin hona chaahie.
haalaanki, kuchh cheezen usb ko zyaada garam kar sakatee hain aur sambhaavit roop se nukasaan pahuncha sakatee hain. ek theek se kaam karane vaalee draiv ko zyaada garam nahin karana chaahie, lekin agar yah jis bandaragaah se juda hai vah doshapoorn hai, to ise bahut adhik shakti praapt ho sakatee hai. atirikt shakti, jaisa ki oopar ullekh kiya gaya hai, garmee mein sthaanaantarit kiya jaata hai aur sambhavatah aapako ya draiv ko jala sakata hai. yah vishesh roop se dhaatu kanektar ke saath sach hai, isalie dhyaan rakhen.
isake alaava, yadi aapaka draiv bahut garm ho raha hai, to yah bhee sambhav hai ki ek aantarik ghatak viphal ho gaya hai aur bahut adhik bijalee yooesabee se gujar rahee hai.
yadi aapakee draiv aapako jalaane ke lie paryaapt garm hai, to kapade ya potholdars ke mote tukade ka upayog karake ise kampyootar se saavadhaaneepoorvak hata den. ise thanda hone den aur doosare draiv ke saath port ka pareekshan karen. yadi yah garm hota hai, to aapake paas ek doshapoorn yooesabee port hone kee sambhaavana hai. yadi nahin, to aap sunishchit kar sakate hain ki galatee bahut garm draiv ke saath hai.
yahaan tootee huee phlaish draiv deta rikavaree ke baare mein jaanen aur yahaan tootee ya dooshit yooesabee draiv se deta kaise punarpraapt karen.
apane usb draiv ko madhyam taapamaan par rakhana mahatvapoorn hai kyonki isake aantarik ghatak taapamaan ke lie atisanvedanasheel hote hain. yadi ve adhik aardrata aur taapamaan (ya to bahut garm ya bahut thanda) ke sampark mein aate hain, to memoree aur kantrolar chips kharaab ho sakate hain aur pooree tarah se dooshit ho sakate hain. garmee ke lie lambe samay tak jokhim vishesh roop se aapake draiv ko bahut jaldee maar dega. apanee kaar ya baahar jaise char vaataavaran mein apanee draiv ko chhodane se bachen.
No, No need of internet in sharing any file from computer to pen drive/
PC Transfer Software for PC to PC File Transfer Software Without Internet
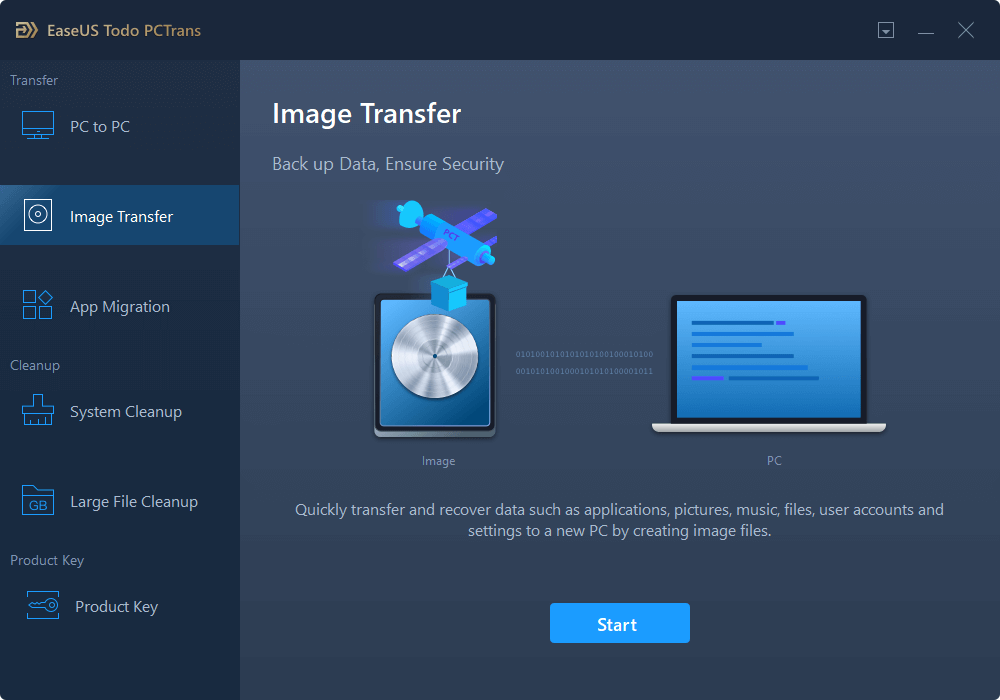
Here we highly recommend you download and try one of the best PC transfer software - EaseUS Todo PCTrans to transfer files without internet. This tool allows you to directly transfer files from old PC to new PC in three patterns like demonstrated below.
PC to PC: This feature enables you to transfer files via the network connection. Connect two Windows laptops/PCs by IP in the same LAN and move your files, apps & accounts off the old PC to a new one.
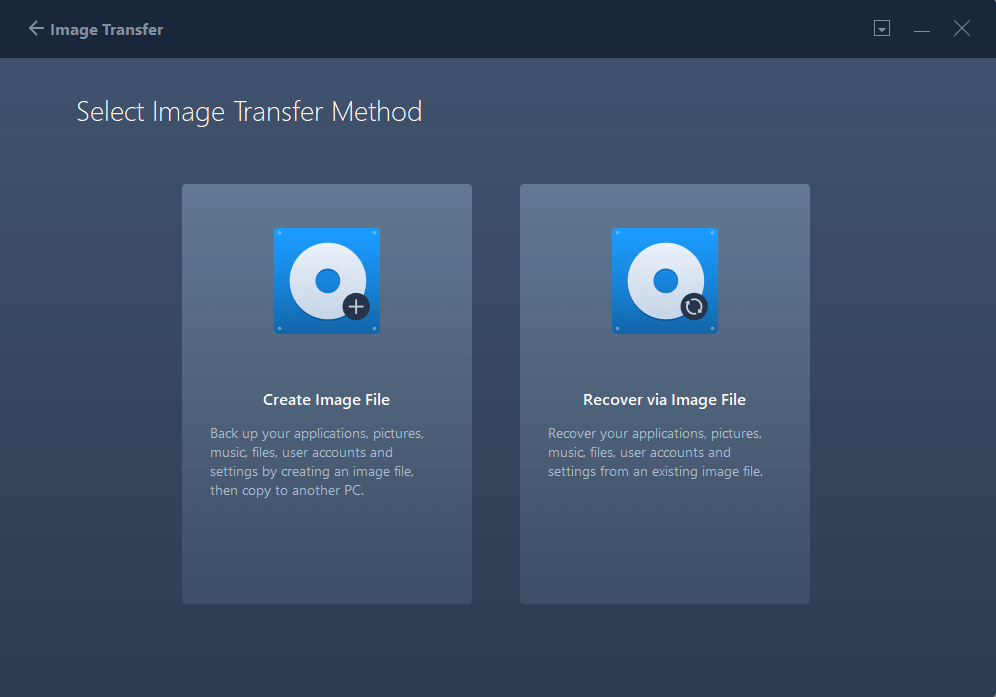
Image Transfer: This function is what can help you here. You can use this mode to transfer files from PC to PC without the internet. Make images of files, folders, or software on the previous computer, and transfer to the next one. It also works as a backup.
App Migration: This one allows you to copy installed programs from one disk to another locally and free up space to resolve low disk space issue.
You can follow the steps below and apply EaseUS Todo PCTrans to start using the Image Transfer function to transfer your files from PC to PC without using the internet.
Activate this software to gain the ability for transferring unlimited files and folders to a new device.
EaseUS Todo PCTrans
Start transferring unlimited files now
Click to Activate
$49.95
Step 1.Create a file image to transfer
Launch EaseUS Todo PCTrans on the source PC. Click "Image Transfer" and click "Start" to go on.
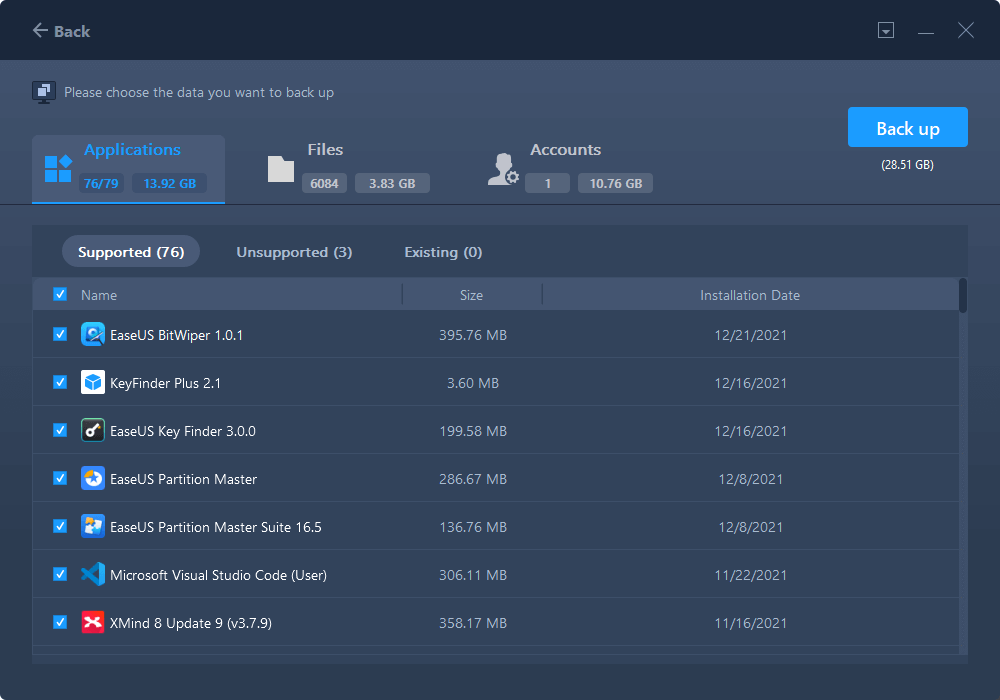
Choose "Create Image File" > "Create". Name the image file, and set the external USB drive as the destination to save the image.
At the "Files" section, click "Edit" to choose files. Then, click "Finish" > "Create" to wait for the process to complete.
When the creating process has completed, click "OK" to confirm. Safely eject the USB drive and connect it to the target PC. Move to recover the image of files to the new PC using USB.
Step 2. Recover and Transfer Image files to PC without network
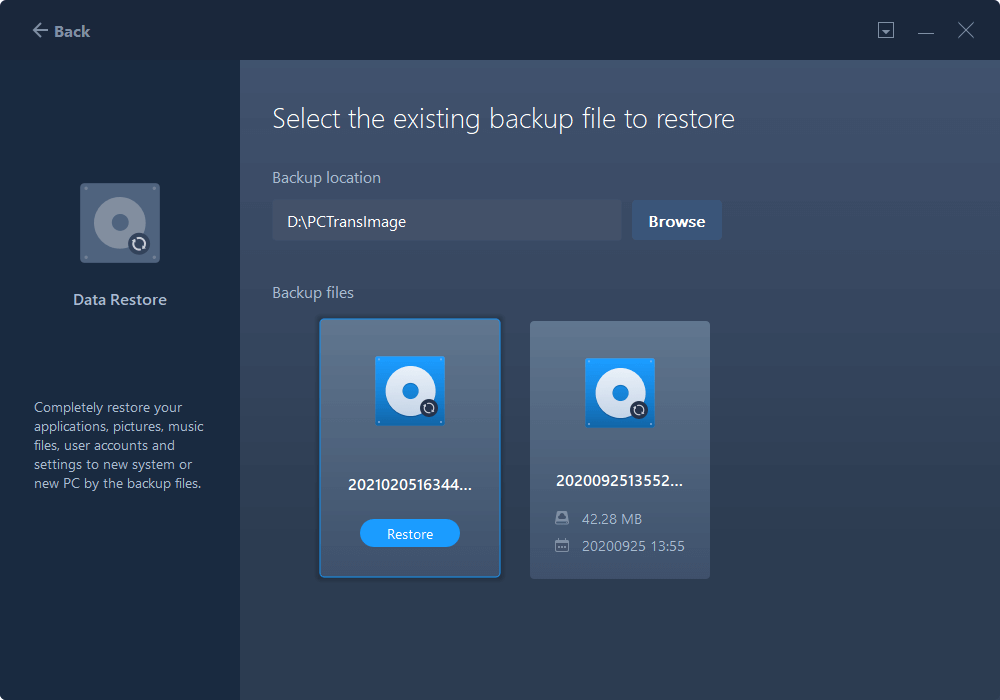
Connect the external USB drive with the file image created from source PC to the target PC. Launch PCTrans, click "Image Transfer" > "Start" > "Recover via Image File" > "Recover".
Click "Browse" to find the image file in your USB drive. Then, choose the correct image file and click "Recover" to continue.
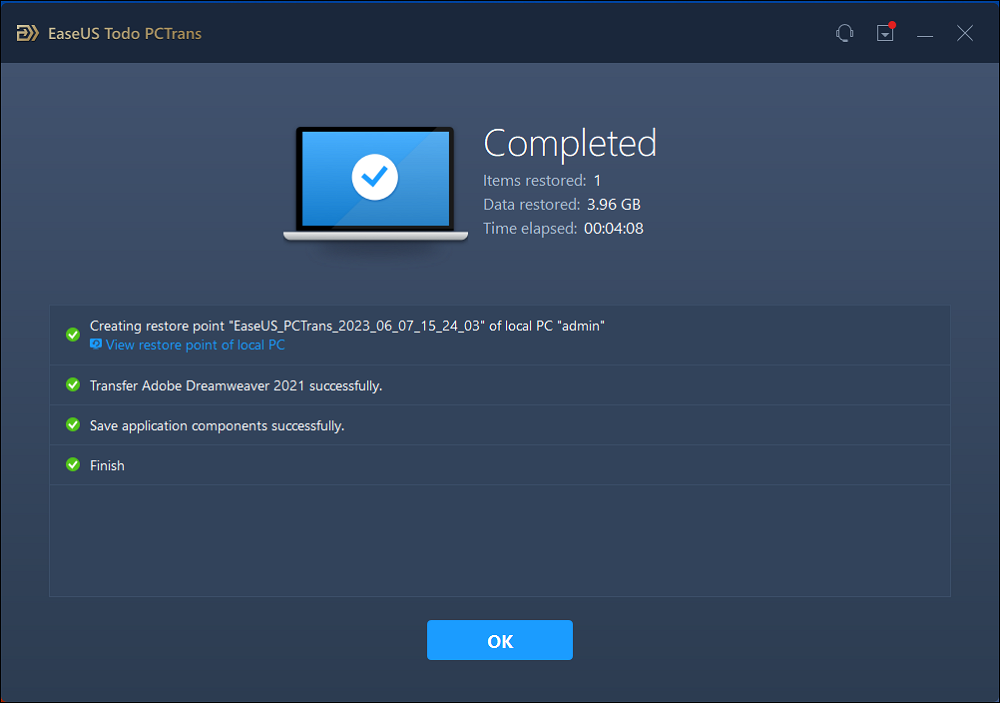
You can choose to transfer all the files or click "Edit" > choose specific files > "Finish" > "Recover" to recover specific files.
Use a USB-USB Cable to Transfer Files from PC to PC Without Internet
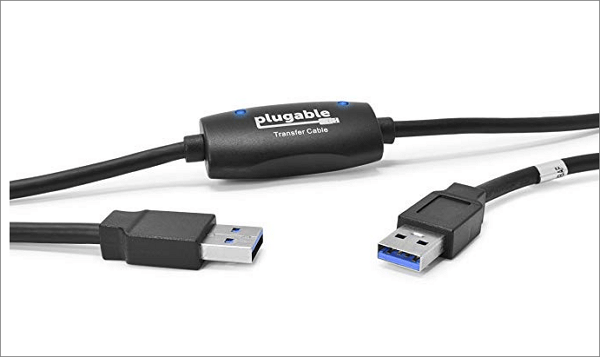
If you don't want to use a third-party program to transfer files offline, another way is taking the USB-USB cable for help. To do so, you need a USB-to-USB bridging cable or USB networking cable as shown below.
This PC data transfer cable works great for transferring files and folders (do not transfer programs) when upgrading from an older Windows 10/8/7 computer to a newer one. Both Windows 32-bit and 64-bit versions are supported. You can buy a USB transfer cable on amazon for $54.45.
Now, let's learn how to transfer files from PC to PC without internet via the USB transfer cable.
Step 1. Boot both the PCs. Wait till both of them finishes the startup process and are ready to be used.
Step 2. Insert one end of the cable into the USB port of your PC 1, and the other end into the USB port of PC 2. Wait till both the PCs recognize the USB cable. This should also start an installation wizard.
Step 3. Choose the installation type by selecting the "USB Super link adapter." Then, click "Next" to continue.
Step 4. Select "High-Speed Data Bridge" from the "Mode" drop-down menu.
Step 5. Click on the"Start"menu and select "Run...". Type devmgmt.msc and hit "Enter".
Step 6. Click on the little plus sign to expand "System Devices." Check to make sure your USB cable is listed as "Hi-Speed USB Bridge Cable." Your cable may use a slightly different name, depending on the manufacturer.
Step 7. Insert the installation disk that was packaged with the USB cable into your CD/DVD-ROM drive. Follow the guided prompts to install the data transfer software. Repeat this step for the other computer to install the same software.
Step 8. Launch the program on both computers. You should see a two-sided window. On its left side, it will show your computer, and on its right side, it will show the remote computer or the new computer where you want to transfer the data.
Step 9. Select the drive/partition as per your preference. Drag the folders and files you want to transfer and drop them to the desired location. Disconnect the cable when the transfer is done.
As you can see, this method has three obvious disadvantages:
This method is very complicated and extremely difficult to operate.
A USB-to-USB bridging cable is expensive. It's more expensive than buying third-party PC data transfer software.
The USB cable doesn't support migrating applications, only files, and folders.
So, to avoid these inconvenience, we highly recommend you try EaseUS Todo PCTrans to transfer files without internet in a much simpler way. It takes only two steps to complete the transfer - creating the file image on source PC and restoring the image on the target PC.
Wrap It Up
This article covers the two most useful solutions to transfer files from PC to PC or move files from laptop to laptop without internet. After reading the content and making a comparison, we believe that it's better for you to do it with an easy and reliable PC transfer program instead of the complicate USB cable. Additionally, if the data is not very large, you can use an external hard drive to copy and paste files from one computer to another offline.
See More: How to Transfer Files from PC to PC Using WiFi
Online transfer is the counterpart of offline transfer, which is also the actual needs of most people. You can transfer files from one PC to another or transfer files from one laptop to another wirelessly in a few ways. The how-article - transfer files from PC to PC in Windows 10 shows you the two easiest ways to migrate data from PC to PC by using a 1-click PC data transfer tool and Windows 10 Nearby sharing feature.
RS-232C, EIA RS-232, or simply RS-232, refers to the same standard
defined by the Electronic Industries Association in 1969 for serial
communication.
DTE and DCE
DTE stands for Data Terminal Equipment. A computer is a DTE. DCE stands for Data Communication Equipment. A modem is a DCE.
DTE normally comes with a Male Connector, while DCE comes with a
Female Connector. However, that is not always true. Use the simple way
below to confirm: Measure Pin 3 and Pin 5 of a DB-9 Connector with a
Volt Meter, if you get a voltage of -3V to -15V, then it is a DTE
device. If the voltage is on Pin 2, then it is a DCE device.
Note: The result for a DB-25 Connector is reversed (Please refer to DB-9 to DB-25 conversion table below).
RS-232 Pin outs (DB-9)
A male DB-9 connector viewed from the front. Reverse or back view of male connector for Female Connector.
DTE Pin Assignment (DB-9)
DCE Pin Assignment (DB-9)
1
DCD
Data Carrier Detect
1
DCD
Data Carrier Detect
2
RxD
Receive Data
2
TxD
Transmit Data
3
TxD
Transmit Data
3
RxD
Receive Data
4
DTR
Data Terminal Ready
4
DSR
Data Set Ready
5
GND
Ground (Signal)
5
GND
Ground (Signal)
6
DSR
Data Set Ready
6
DTR
Data Terminal Ready
7
RTS
Request to Send
7
CTS
Clear to Send
8
CTS
Clear to Send
8
RTS
Request to Send
9
RI
Ring Indicator
9
RI
Ring Indicator
DB-9 to DB-25 Conversion
DB-9
DB-25
Function
1
8
DCD
Data Carrier Detect
2
3
RxD
Receive Data
3
2
TxD
Transmit Data
4
20
DTR
Data Terminal Ready
5
7
GND
Ground (Signal)
6
6
DSR
Data Set Ready
7
4
RTS
Request to Send
8
5
CTS
Clear to Send
9
22
RI
Ring Indicator
RS-232 Connections
A straight-through cable is used to connect a DTE (e.g. computer) to a
DCE (e.g. modem), all signals in one side connected to the
corresponding signals in the other side in a one-to-one basis. A
crossover (null-modem) cable is used to connect two DTE directly,
without a modem in between. They cross transmit and receive data signals
between the two sides and there are many variations on how the other
control signals are wired, below is one of them:
Straight-through (DB-9)
Crossover (Null-Modem) (DB-9)
(DTE)
(DCE)
(DTE)
(DTE)
1
DCD
-------
DCD
1
1
DCD
DCD
1
2
RxD
-------
TxD
2
2
RxD
-------
TxD
3
3
TxD
-------
RxD
3
3
TxD
-------
RxD
2
4
DTR
-------
DSR
4
4
DTR
-------
DSR
6
5
GND
-------
GND
5
5
GND
-------
GND
5
6
DSR
-------
DTR
6
6
DSR
-------
DTR
4
7
RTS
-------
CTS
7
7
RTS
-------
CTS
8
8
CTS
-------
RTS
8
8
CTS
-------
RTS
7
9
RI
-------
RI
9
9
RI
RI
9
RS-232 Signals
RS-232 Logic Waveform (8N1)The graphic above illustrates a typical RS-232 logic waveform (Data
format: 1 Start bit, 8 Data bits, No Parity, 1 Stop bit). The data
transmission starts with a Start bit, followed by the data bits (LSB
sent first and MSB sent last), and ends with a "Stop" bit.
The voltage of Logic "1" (Mark) is between -3VDC to -15VDC, while the Logic "0" (Space) is between +3VDC to +15VDC.
RS-232 connects the Ground of 2 different devices together, which is
the so-called "Unbalanced" connection. An unbalanced connection is more
susceptible to noise, and has a distance limitation of 50 ft (which is
around 15 meters).
Step 2: Learn about the Protocol
A protocol is one or a few sets of hardware and software rules agreed
to by all communication parties for exchanging data correctly and
efficiently.
Synchronous and Asynchronous Communications
Synchronous Communication requires the sender and receiver to share
the same clock. The sender provides a timing signal to the receiver so
that the receiver knows when to "read" the data. Synchronous
Communication generally has higher data rates and greater error-checking
capability. A printer is a form of Synchronous Communication.
Asynchronous Communication has no timing signal or clock. Instead, it
inserts Start / Stop bits into each byte of data to "synchronize" the
communication. As it uses less wires for communication (no clock
signals), Asynchronous Communication is simpler and more cost-effective.
RS-232 / RS-485 / RS-422 / TTL are the forms of Asynchronous
Communications.
Drilling Down: Bits and Bytes
Internal computer communications consists of digital electronics,
represented by only two conditions: ON or OFF. We represent these with
two numbers: 0 and 1, which in the binary system is termed a Bit.
A Byte consists of 8 bits, which represents decimal number 0 to 255,
or Hexadecimal number 0 to FF. As described above, a byte is the basic
unit of Asynchronous communications.
Baud rate, Data bits, Parity, and Stop bit
The baud rate is the communication speed that measures the number of
bit transfers per second. For example, 19200 baud is 19200 bits per
second.
Data bits are a measurement of the actual data bits in a
communication packet. For example, the above graphic shows eight (8)
data bits in a communication packet. A communication packet refers to a
single byte transfer, including Start / Stop bits, Data bits and Parity.
If you are transferring a standard ASCII code (0 to 127), 7 data bits
are enough. If it is an extended ASCII code (128 to 255), then 8 data
bits are required.
Parity is a simple way to error-check. There are Even, Odd, Mark and
Space indicators. You can also use no parity. For Even and Odd parity,
the serial port sets the parity bit (the last bit after the data bit) to
a value to ensure that the data packet has an Even or Odd number of
logic-high bits. For example, if the data is 10010010, for Even parity,
the serial port sets the parity bit as 1 to keep the number of
logic-high bits Even. For Odd parity, the parity bit is 0 so that the
number of logic-high bits is Odd. Mark parity simply sets the parity bit
to logic-high and Space sets the parity bit to logic-low, so that the
receiving party can determine if the data is corrupted.
Stop bits are used to signal the end of a communication packet. This
also helps to synchronize different clocks on the serial devices.
Handshaking (Flow Control)
Handshaking is also called "Flow Control". The main purpose of
Handshaking is to prevent receiver overloading. By using Handshaking
signals, receivers will be able to tell the sending device to pause data
transmission if the receiver is overloaded. There are three types of
handshaking: Software handshaking, Hardware handshaking and Both.
Software handshaking uses two control characters: XON and XOFF. The
receiver sends these control characters to pause transmitter during
communication. XON is decimal 17 and XOFF is decimal 19 in the ASCII
chart. The drawback of Software handshaking is that these two control
characters can not be used in data. This is quite important when you are
transmitting Binary data as you might need to use these two codes in
your data.
Hardware handshaking makes use of actual hardware lines, such as RTS / CTS, DTR / DSR, and DCD / RI (for modem).
In DTE / DCE communication, RTS (Request to Send) is an output on the
DTE and input on the DCE. CTS (Clear to Send) is the answering signal
coming from the DCE. Before sending a data, the DTE asks permission by
setting its RTS output to high. No data will be sent until the DCE
grants permission by using the CTS line. The DTE uses the DTR (Data
Terminal Ready) signal to indicate it is ready to accept information,
whereas the DCE uses the DSR signal for the same purpose. DTR/DSR are
normally ON or OFF for the whole connection session (e.g. Off-hook),
while RTS/CTS are ON or OFF for each data transmission. DCD (Data
Carrier Ready) is used by the modem when a connection has been
established with remote equipment, while RI (Ring Indicator) is used by
the modem to indicate a ring signal from telephone line.
Data formats (Binary, Hex, Dec, Oct, and ASCII)
Serial devices use Binary for communication, which consists of just two unique numbers: 0 and 1.
Binary is the Base-2 numbering system. One byte of data consists of 8
binary digits, from 0000 0000 to 1111 1111. Hexadecimal is the base-16
system, which consists of 16 numbers: 0 to 9 and the letters A to F
(decimal number 15).
The Hexadecimal numbering system is useful because it can represent
every byte as two consecutive hexadecimal digits, and it is easier for
humans to read Hexadecimal numbers than Binary numbers. Most of the
manufacturers use Hexadecimal in their protocol documentation. It is
simple to convert a value from Hexadecimal to Binary. Just translate
each Hexadecimal digit into its 4-bit binary equivalent. E.g.
Hexadecimal number F3 equals Binary number 1111 0011.
Decimal refers to numbers in base 10, which is the numbering system
we use most in everyday life. It's not as easy as Hexadecimal and Octal
to converter Decimal to Binary number, but it is easier for us to
understand Decimal.
Octal refers to the base-8 numbering system, which uses just eight
unique symbols (0 to 7). Programmers often use Octal format because it
is relatively easy for people to read and can easily be translated into
binary format: each Octal digit represents 3 binary digits. E.g. Octal
number 73 equals to Binary number 111 011.
ASCII (American Standard Code for Information Interchange) is a
character encoding based on the English alphabet. ASCII codes (both
readable and unreadable) are widely used in communications, such as
Modem communications. Letters A to Z and numbers 0 to 9 are readable
ASCII codes. Some ASCII codes are unreadable, such as the control codes:
XON and XOFF, which are used in Software flow control.
Checksum
Many serial protocols use checksum (additional bytes added at the end
of the data string) to check the data integrity, as errors might occur
during data transmission. There are many types of checksum, from the
simplest uses of it in Modula or BCC to sophisticated CRC calculation.
Using Modula as an example, we learn that before data transmission, the
sender adds all command bytes together then mod it by 255 (decimal) to
get an additional byte. This is to be added at the end of the command
string. When the receiver receives the command string, it will first
check the added byte to see whether data remain unchanged or not. If
that is the case, it will accept the data, and if not, it will ask the
sender to resend the data.
Examples of protocol commands
A protocol command is a data string sent from one serial device (e.g.
a Computer) to another (i.e. a Modem). Here are some examples:
ASCII command example: ATI1 to query Modem manufacturer's information. (Note: are the control codes of Carriage Return and Line Feed).
Convert the command string above to Hexadecimal and it becomes: 41 54 49 31 0D 0A
Convert the command string above to Decimal and it becomes: 065 084 073 049 013 010
Convert the command string above to Octal and it becomes: 101 124 111 061 015 012
Convert the command string above to Binary and it becomes: 01000001 01010100 01001001 00110001 00001101 00001010
Step 3: Control your RS232 devices by using 232Analyzer
232Analyzer is an Advanced Serial Port Protocol Analyzer software,
which allows you to control / debug, monitor / sniff serial devices
(RS-232 / RS-485 / RS-422 / TTL) right from your PC. 232Analyzer is a
shareware, the FREE version has some limitation but is more than enough
to test and control your serial devices. Click here to download a FREE copy.
Checksum calculation
232Analyzer comes with a Checksum calculator, which allows you to
calculate the complicated checksum byte in seconds, here is an example:
Suppose that you are controlling a projector, and the projector
protocol uses xOR to get the additional checksum byte, the command
string to turn ON the projector is: "1A 2B 3C" plus the Checksum byte.
Use the following procedures to calculate the Checksum byte:
Select Hex as an operands format
Select xOr as an operator
Key in the command string and append a comma (,) after each byte of command code: e.g. 1A,2B,3C,
Click on the "Calculate" button and you will get the result of 0D (0 is omitted)
Select COM port and Setup communication formats
From the above toolbar example, the COM port connected to the
projector has been set as: COM port: 5, Baud Rate: 19,200 bps, Data bit:
8, Parity: Even, Stop bit: 1.
Note: After you have set up the correct communication formats (they
must match with the projector's COM port settings), click on the
"Connect" button on the left to activate the COM port.
Flow control settings
Flow control can be set from the window above. Either Software (XON /
XOFF), Hardware (RTS / CTS), Both (Software + Hardware), or None can be
selected.
Control your RS232 devices
Control / Monitor Line States
232Analyzer allows you to control / monitor line states of your COM ports.
Line states of RTS and DTR will be toggled when the respective LED
is clicked, you can use a voltage-meter to verify the changes, you
should get +6V to +15V when the line state is ON, and -6V to -15V when
the line state is OFF.
Other line states can be monitored through the Virtual Ds, such as RX, TX, DSR, CTS, DCD and RI.
Send / Receive commands
Use the above example to control a projector (turn ON the projector),
key in the complete command string "1A,2B,3C,0D," into the
Send_Command_Pane as shown above, and then click on the "Send" button...
Notes:
In the FREE version, Hex mode is not available. You can use Decimal format to send out the command string: "26,43,60,13,"
You can use any RS-232 device for testing, as long as you know the protocol commands.
Need Pendrive for data storage: list of best pen drives
It’s crucial that you get the best USB pendrive you can, whatever you might need them for or however you plan on using them.
In this list of the best Pendrives that we’ve compiled, we dig into your options. They should provide a level of security and portability only USB pendrives can offer for those taking their data on the go, whether it’s crucial work files or photos from your last trip.
And it’s not just a matter of convenience or speed. The best USB pendrives not only let you transfer files between computers but they’re also incredibly flexible due to the surprising amount of storage they hold for such a small device.
The best USB pendrives also need to be well built so that you can use them over and over without worry. It shouldn’t fall apart just because you keep putting it in your pocket. You don’t want them to fail either and potentially lose whatever important files you’re transporting. The best flash drives have to be rugged and well made.
1. Patriot Supersonic Rage 2 USB flash drive
High-end USB
If your pendrive needs demand blazing fast speeds, then one of the best USB pen drives to consider is the Patriot Supersonic Rage 2 is definitely the one for you. Sure, the price is high, but we were blown away with just how fast this device is. If you need to move around large files quickly, then this is definitely worth the cost.
It also comes with 128GB of storage space, which is a phenomenal amount to carry around in your pocket. Just make sure you don't lose it!
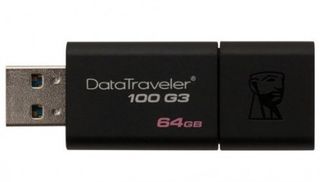
The Kingston Technology DataTraveler 100 Generation 3 is incredibly compact and affordable. (Image Credit: Kingston)
2. Kingston Technology DataTraveler 100 Generation 3 USB flash drive
Best 64GB USB drive
Capacity: 64GB | Interface: USB 3.0
At times, when purchasing a USB flash drive, the cost of postage and packaging actually constitute more of the price than the USB stick itself. However, the Kingston Technology DataTraveler 100 Generation 3 is incredibly compact and an affordable drive that is more than worth the cost of shipping. This flash drive is the most affordable 64GB USB 3.0 drive on the market, touting read/write speeds of 150Mbps and 70Mbps respectively to make it worth every cent.
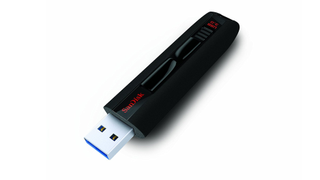
3. SanDisk Extreme CZ80 USB flash drive
Fast, reliable and cheap
Capacity: 32GB | Interface: USB 3.0
The brilliantly priced SanDisk Extreme CZ80 is among the best USB drives, as it offers plenty of storage space and fast file transfer speeds. Be prepared to be impressed as while it’s priced more towards the budget end of USB sticks, its performance is anything but budget. This one’s is a speedy little performer.
Plus, the slide-out design of this stick means you can tuck the USB interface into the body when not in use, protecting it and minimizing the risk of it getting damaged when you're carrying it around.
Advertisement
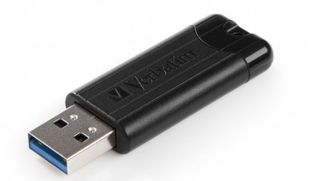
The Verbatim Pinstripe is the cheapest USB 3.0 drive on the market per GB. (Image Credit: Verbatim)
4. Verbatim Pinstripe USB flash drive
Best 128GB USB drive
Capacity: 128GB | Interface: USB 3.0
This is the cheapest USB 3.0 drive on the market per GB. It comes with a two-year warranty as well as a capless/retractable cap design.
It’s worth noting that Verbatim - a very well-known Japanese storage and memory manufacturer - sells it on its website where you’ll often find excellent deals on the device. As if it isn’t cheap enough as it is.
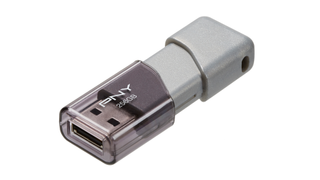
The PNY Turbo 256GB boasts read/write speeds of 80Mbps and 20Mbps respectively. (Image Credit: PNY)
5. PNY Turbo 256GB USB flash drive
Best 256GB USB drive
Capacity: 256GB | Interface: USB 3.0
PNY is another memory manufacturer turned player in the USB market. The PNY Turbo 256GB USB drive one of the best USB drives right now, featuring a capped design for protecting as well as read/write speeds of 80Mbps and 20Mbps respectively.
These are not the fastest speeds out there so if you require something with more oomph, then check out some of the other USB drives in this roundup.
Advertisement
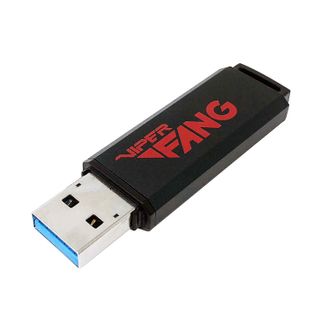
The Patriot Viper Fang has a zinc alloy body with aluminum accent. (Image Credit: Patriot) (Image credit: Patriot)
6. Patriot Viper Fang
Large storage space for gamers
Capacity: 128GB – 1TB | Interface: USB 3.1
The Patriot Supersonic is a USB 3.1 drive (compatible with USB 3.0 and 2.0) from one of the most established memory players on the market. However, the manufacturer is a relative newcomer to this segment.
Still, this hard drive rightly deserves a spot on this list, with its a zinc alloy body with aluminum accent and read/write speeds of 380Mbps and 70Mbps respectively. Let’s just say that it’s no slouch. Plus, it also comes with a five-year warranty.
Advertisement
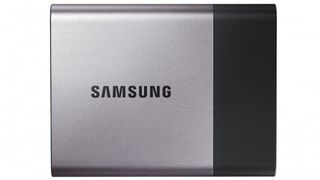
The Samsung T3 SSD offers absurdly high read speeds of up to 450Mbps. (Image Credit: Samsung)
7. Samsung T3 SSD USB flash drive
Best 1TB USB Drive
Capacity: 1TB | Interface: USB 3.1
If you are looking in the premium territory of the best USB flash drives, then the Samsung T3 is worth taking a look at. Not only does it offer absurdly high read speeds of up to 450Mbps thanks to Samsung's own 3D V-NAND technology, but it also comes with a three-year warranty and has a USB Type C connector.
Note that it is much bigger than a traditional flash drive and it does cost about five times a traditional hard drive of a similar capacity. In comparison, a 1TB SSD like the Samsung EVO 850 costs just £240. It comes with V-NAND like the Samsung Portable T1 and it does boast speeds of 530Mbps and 520Mbps in read/write mode respectively. Note that you will need to get a separate enclosure to get it to work with a standard USB port.
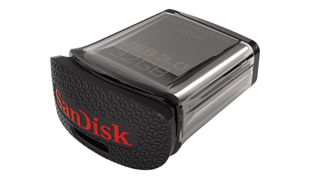
The SanDisk Ultra Fit CZ43 is a low-profile USB stick. (Image Credit: SanDisk)
8. SanDisk Ultra Fit CZ43 USB flash drive
Small and unobtrusive
Capacity: 32GB | Interface: USB 3.0
If you don't want a USB stick jutting out the side of your laptop or tablet while you use it or having one is simple not ideal – for example, when you’re using it while traveling, then a low-profile USB stick is an excellent choice. Take the SanDisk Ultra Fit CZ43. It’s small and light enough to easily carry around. And, when it's plugged into your laptop, it doesn't stick out much from the body, making it more secure when you’re using it on the go.
That’s not all; it’s also very cheap, at around £10 for the 32GB version, with 64GB and 128GB versions also available. It's not quite as fast as many of the best USB flash drives we mentioned here, but if you want a small form factor USB stick, it's worth the trade-off.
How to choose your USB pendrive?
It's not worth looking for memory sticks smaller than 64GB simply because the price difference you pay for two or four times the storage is tiny.
Make sure you include delivery price when doing the numbers as quite often you end up paying more for the postage than the drive itself, particularly for low cost models.
USB 2.0 is sufficient for smaller capacities but not for bigger ones where write speeds can get sluggish. Larger pendrives (128GB or more) often come only with a USB 3.0 connector.
If you plan on moving files to and from portable devices (tablets or smartphones), consider a memory stick with a microUSB connector and a full-size USB one.
Avoid buying your memory sticks from vendors with little feedback on auction websites as these drives might turn out to be fake. All the vendors listed are tried and trusted ones.
Above 128GB, you might want to consider a SSD if you want ruggedness, portability, versatility and better performance without the cost.
Note that the capacities are likely to be lower than stated when they are formatted and mounted on an operating system.


 A male DB-9 connector viewed from the front. Reverse or back view of male connector for Female Connector.
")